I went through a phase of fishing where I spent a large portion of my time only fishing surface patterns. Regardless of temperature or conditions, I had some pattern designed to skate or wake in the film on the end of my tippet. I didn’t care much about catching a fish; I was more about collecting data. I made casts and observed how each pattern swung, noting what I thought my flies were doing versus how they swam because I could see them. I noticed flashes and boils and realized the fish in my home waters responded to my flies. They may not have been eating them, but they were most definitely causing changes in the behaviors of the fish and getting them to react. It is incredibly satisfying for me to watch a small bug leaving a wake on the surface 60′ away as the sun goes down and wondering, “What if a fish eats this thing.”
I’ve had more success with some patterns than others, and confidence in a pattern breeds more success. I have a couple of muddler variations that I rely on, as well as the Thompson River Caddis.
I started tying the TRC more frequently because it’s a fun pattern and a nice change of pace from classic Atlantic salmon patterns. A dubbed body that you can adjust the color to match your waters, a simple pheasant wing, and a very cool collar/head of moose spun in a dubbing loop.
Harry Lemire tied these patterns in hand, and it offers enough of a challenge with the dubbing loop in hand to keep things interesting (or frustrating)
This pattern tends to fish low in the film for me, skidding and sliding in the film depending on the speed of the water I’m fishing it in. I used to be adamant that my surface flies needed to remain on the surface but to be honest, my eyesight wasn’t quite what it used to be at the age of 41. Sometimes, I can’t see the bug regardless. Even though the fly might disappear from your vision, it’s hard to miss the grabs. It might even be more exciting when the pattern sinks below the surface and you see the splash of the take and hear your reel chirp.
There is a window in the spring here when the water starts to warm, the sun can give you a sneaky sunburn, and the larger stoneflies start to hatch in the riffles where this pattern makes sense. I like to fish this pattern in the pocket water where these bugs hatch, where I’ve had the most success. The nature of that transition water makes it challenging to keep the pattern afloat sometimes, but as previously mentioned, I’m okay with it sinking occasionally. Much like the Charlie muddler, I fish in this pattern where the water is a bit faster-paced and full of boulders, which makes it challenging to fish any other method.
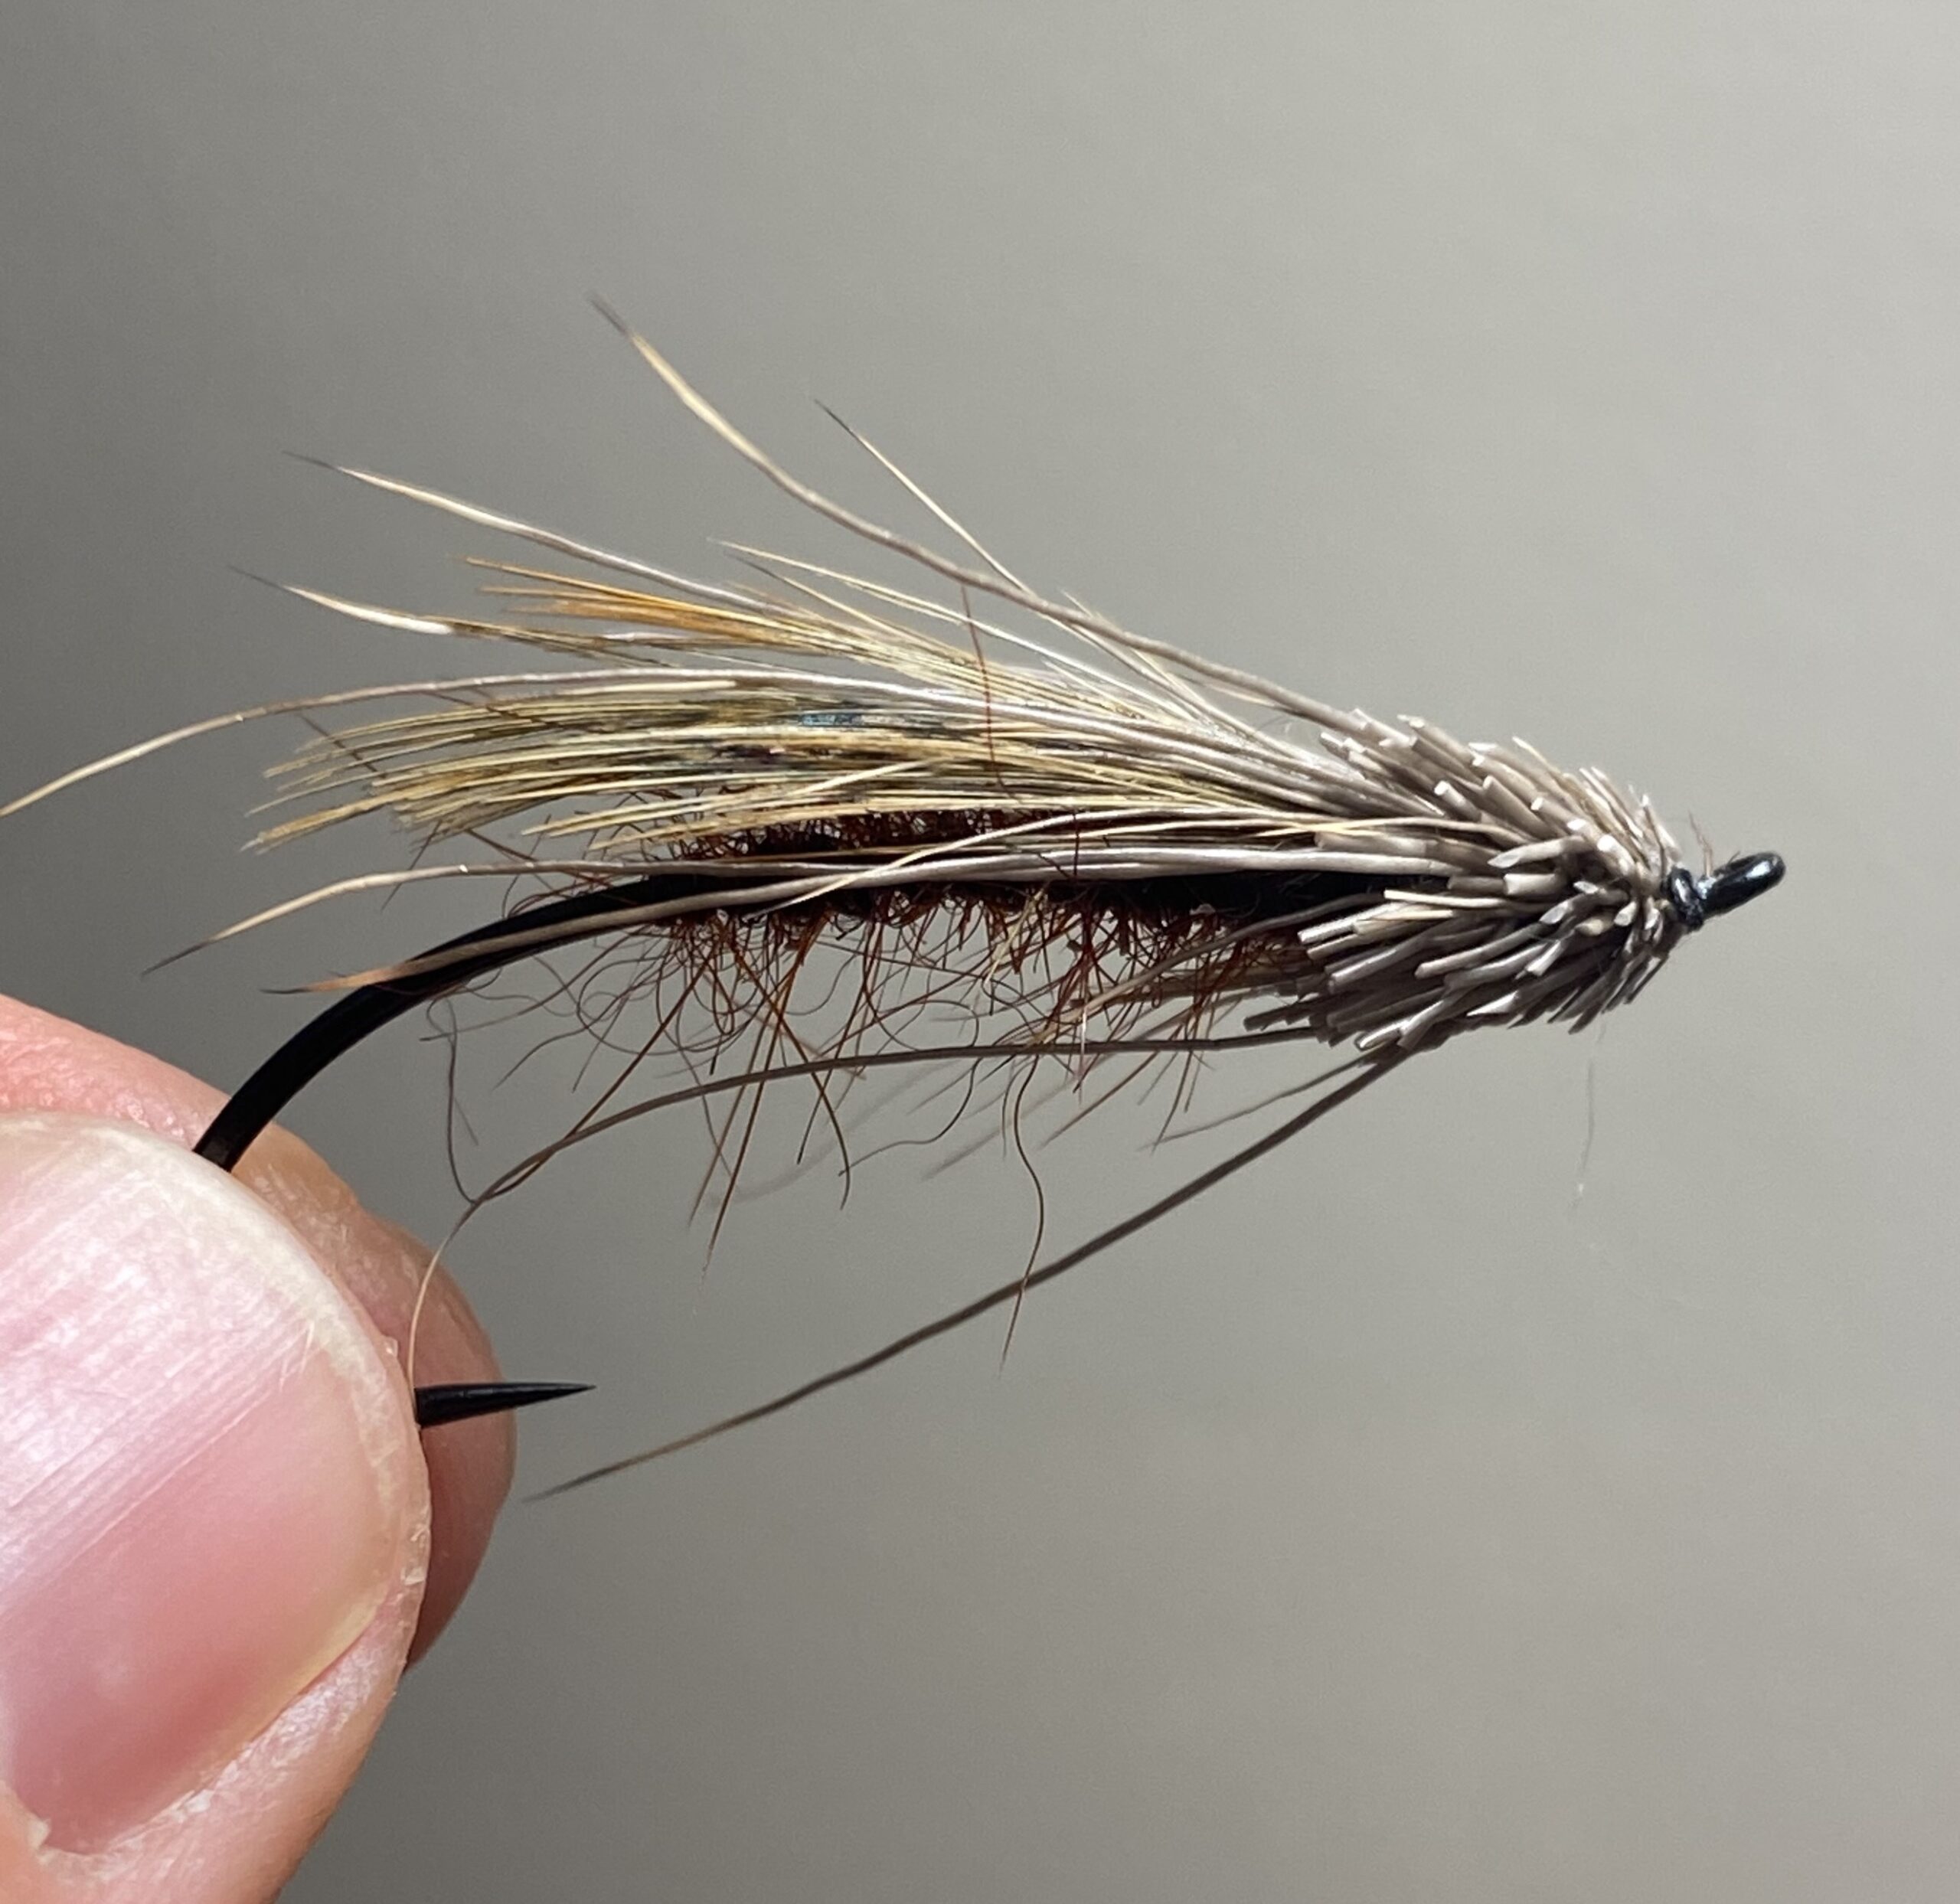
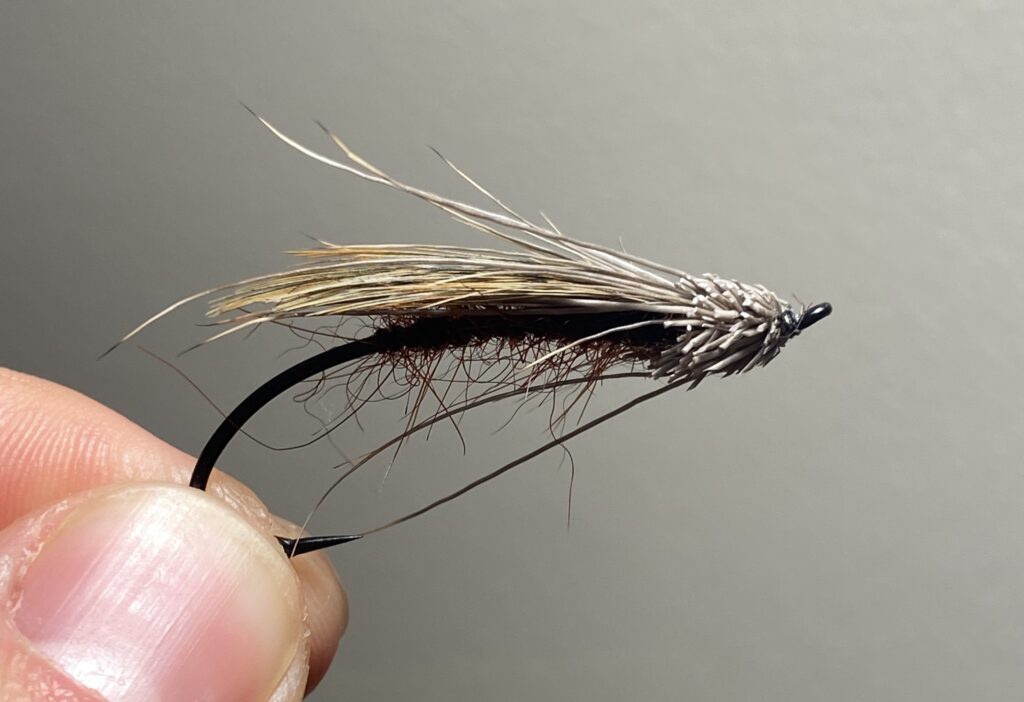
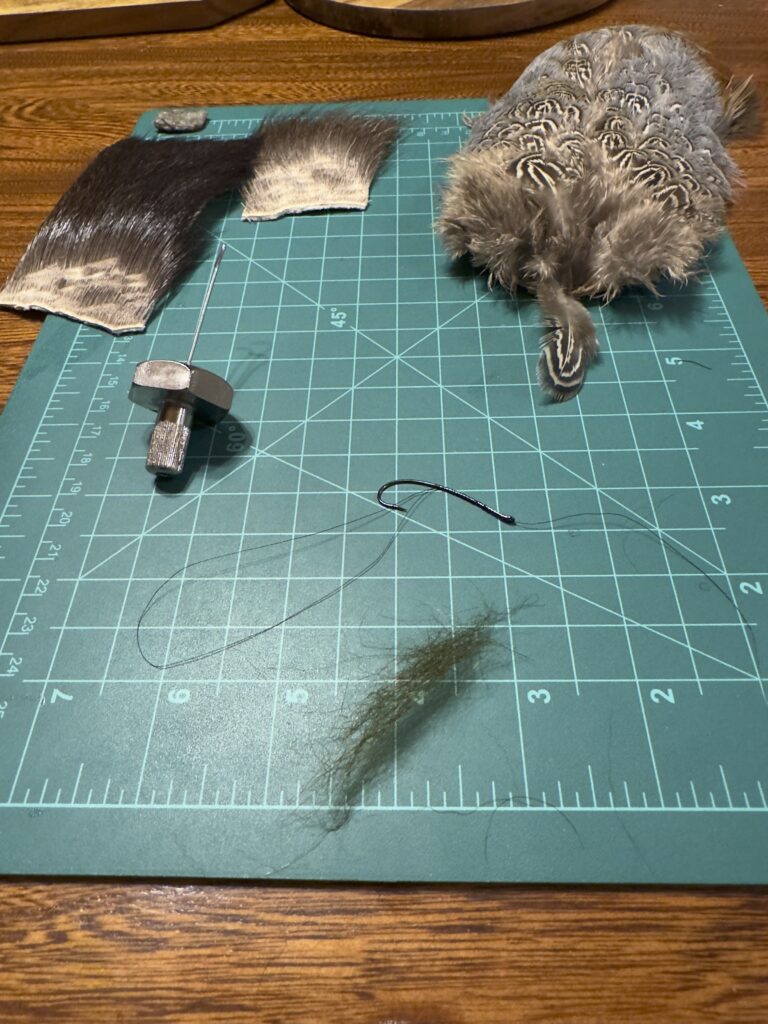
Thompson River Caddis
- Body- any dubbing to match the natural insects around. I like an olive green dubbing.
- Wing- two pheasant back “church window” feathers, one on top of the other
- Collar-spun moose
- Head-spun moose
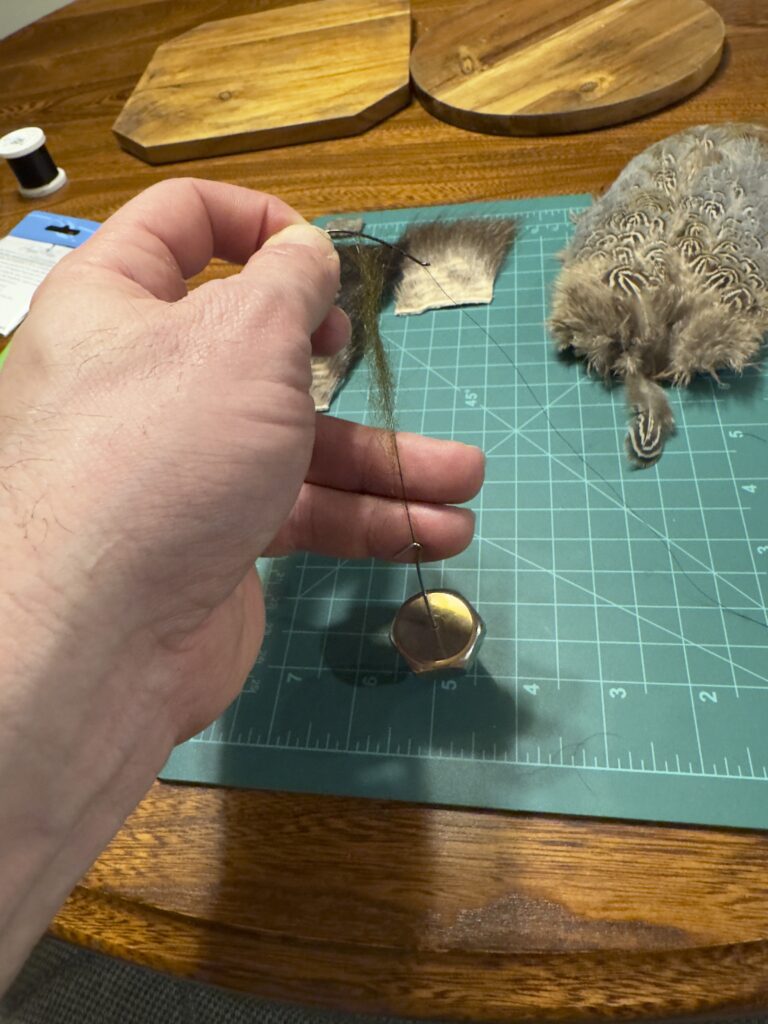
Step 1. Start your thread at the return eye (if there is one) of the hook and run wraps between the hook point and barb depending on your hook choice. Create a dubbing loop by wrapping the thread up and over the hook shank so the thread is on the far side of the hook. Holding the hook in your thumb and index finger, stick your pinkie finger out and pass the thread underneath it while maintaining tension. Take the thread over the shank and then pass it around twice to close the dubbing loop.
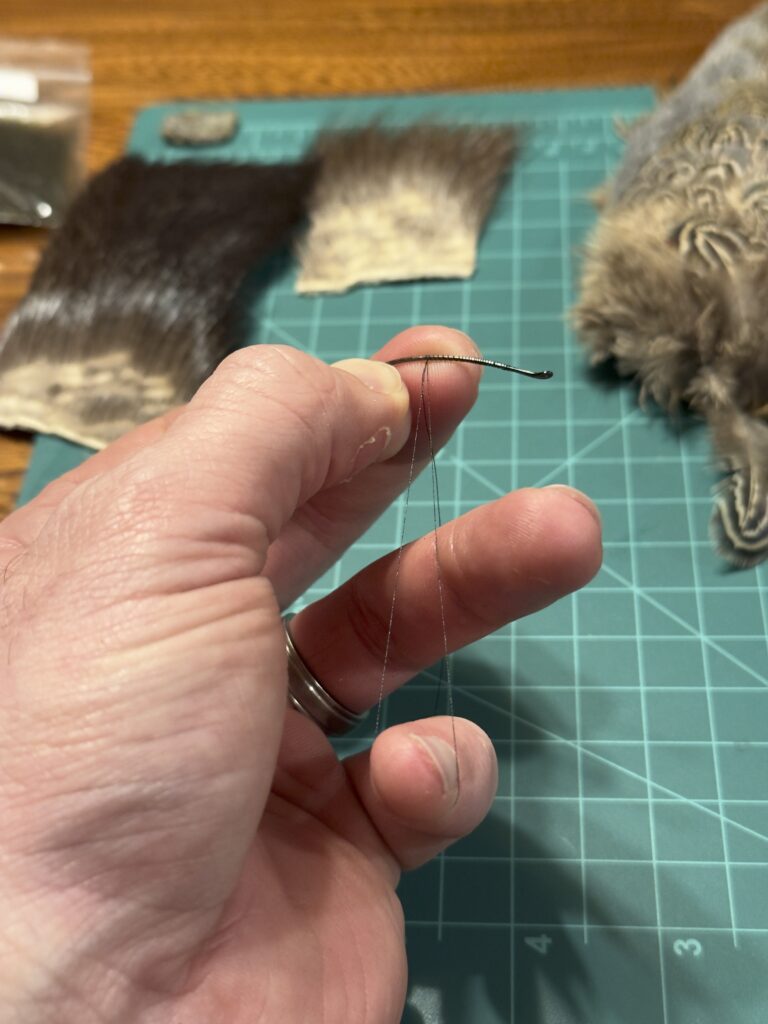
At this point, I spiral the excess thread up to the hook eye and half hitch it. The loop will want to twist, but if it is waxed, you can set the hook down and spread it out to stick to the surface of whatever you are tying on.
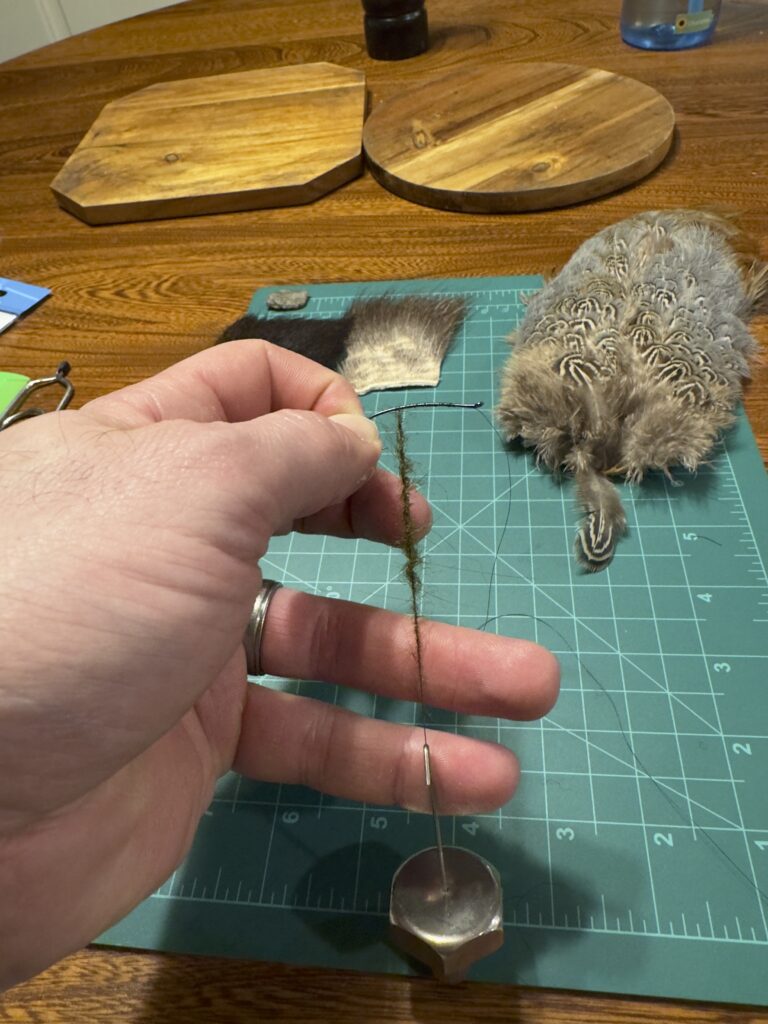
At this point, I’ll roll the dubbing between my fingers to create a noodle 3-4″ long or just shorter than the dubbing loop. Pick up the hook and insert your pinkie finger into the loop to keep it from twisting. Take a dubbing spinner and slide it into the bottom of the loop so its weight now maintains tension on the loop. Keeping a finger in the loop provides an opening to slide the dubbing noodles in.

Once the dubbing noodle is in, slide your finger out of the loop and give the dubbing spinner a twist to lock in the dubbing. Thread color selection can be helpful here. If you have a color similar to the dubbing you’re using, use that. Black tends to mute the colors when wet; I use white thread if I want a brighter body. Wrap the dubbing noodle to roughly the return eye and tie it off.
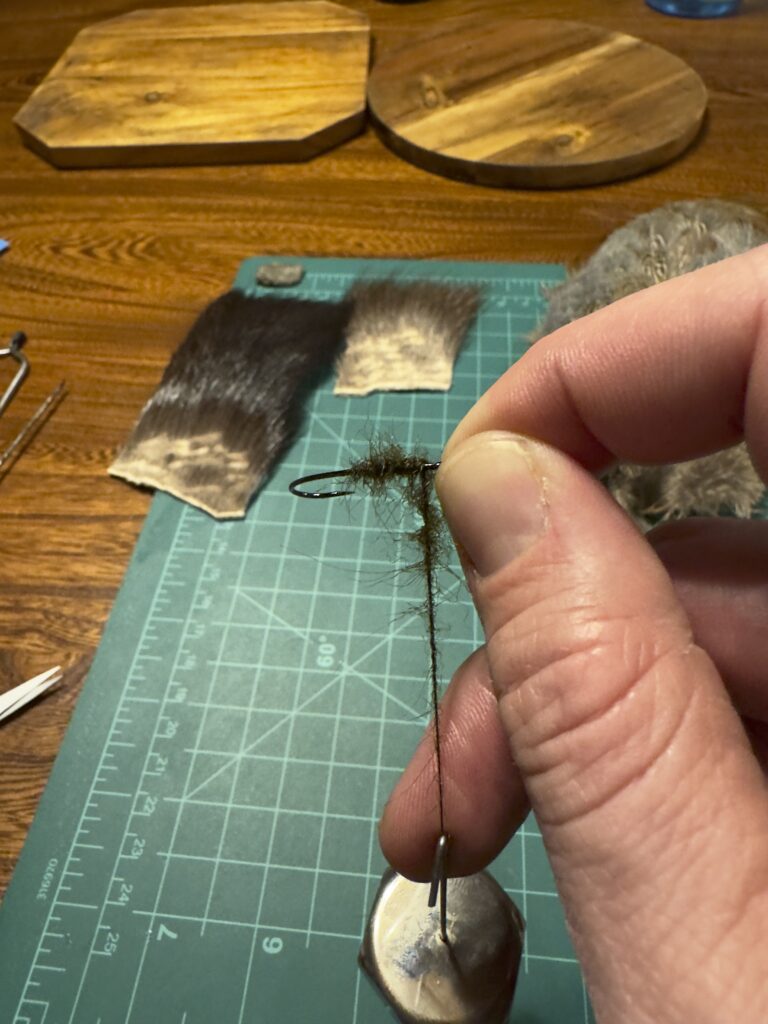
Select two pheasant back “church window” feathers, one shorter than the other, and mount them flat on the hook. I tie in the underwing feather the length of the body and then measure the next feather to be slightly longer to the hook bend.


At this point, I’ll add a half hitch to save my work and trim the stems of the wing. If I used a different thread color for the body and wing tie, I’d change to black thread at this point and then create a small dubbing loop 2-3″ long, the same way that I created the body loop.
The moose can be tricky to deal with. If I select moose body hair by holding the tips between my thumb and index finger and trimming a longer, narrow section of hair rather than a small condensed clump, it helps.
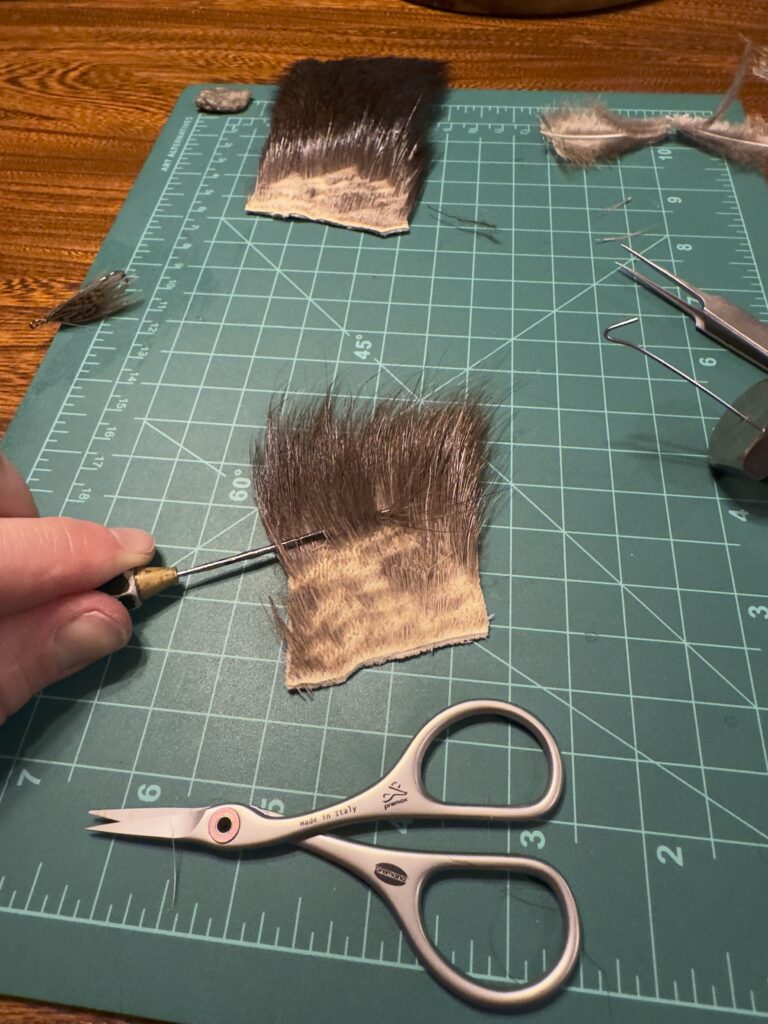
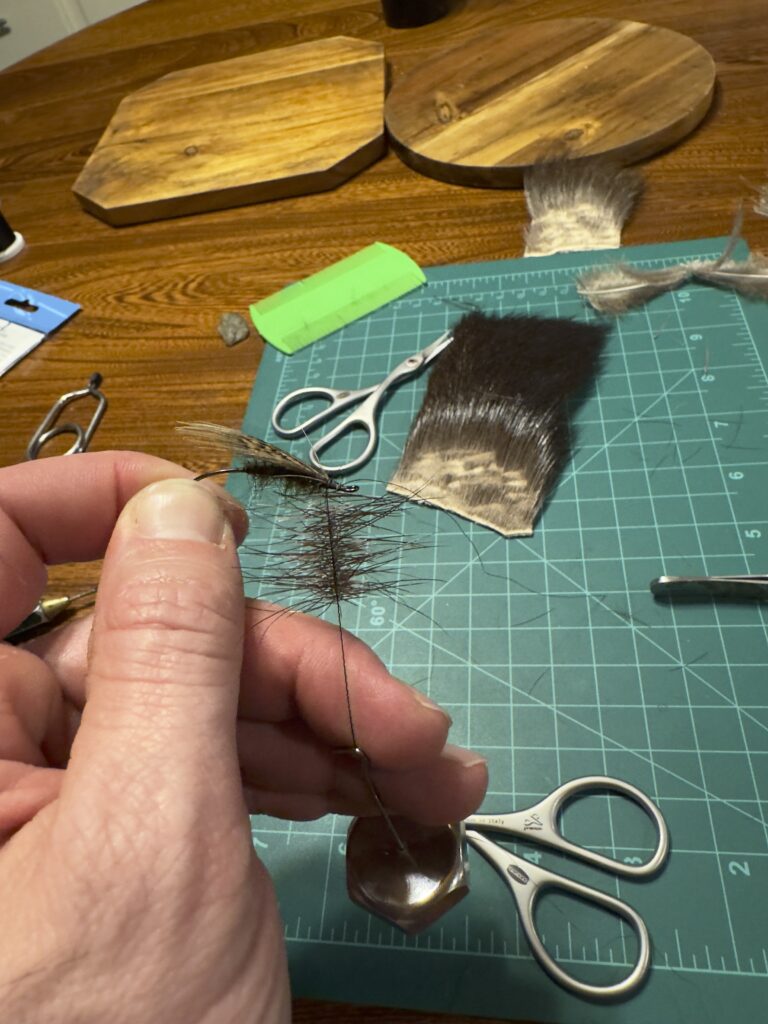
If you do this correctly, you can snip and comb out the underfur without changing the orientation of the moose in hand. There are two goals when spinning this loop of moose, we need a collar of roughly 12 longer fibers that extend the length of the body or longer. We also need enough moose to create the head. After tying a bunch of these, I’ve determined that when tying in hand, it is far easier to work with smaller dubbing loops and create a 2nd or 3rd loop of moose rather than attempting one long loop.
I transfer the moose to my right hand with the butts pointing to the left and then insert it into the dubbing loop. If you keep tension in the loop, you can manipulate the moose hair with a bodkin or your fingers. I try to have roughly 1/4″ of the butts extending on one side of the loop if the length of the moose allows the tips to extend the length of the body or longer. Attempt to keep the moose in one flat layer so it spins properly rather than having multiple clumps of hair on top of itself.
Once everything is pointing perpendicular to the dubbing loop, give your twister a spin to lock everything in, being careful not to break the thread.
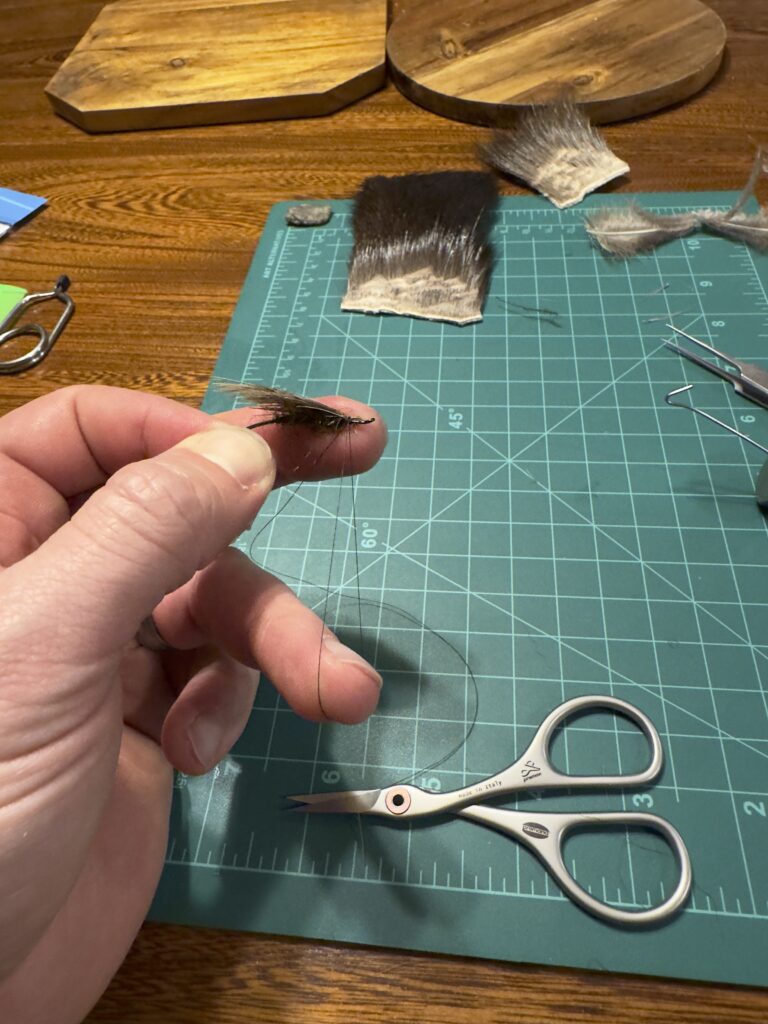
At this point, you should have a dubbing loop spun with a moose that looks like this.
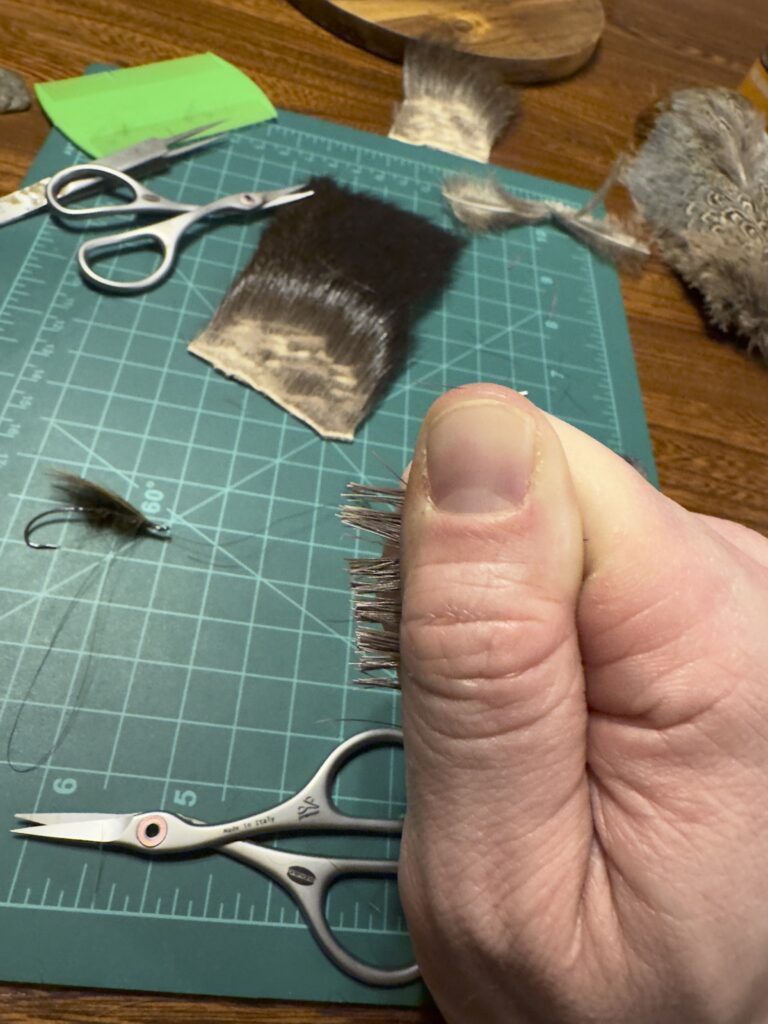
The goal is to leave a small section of longer moose hair while trimming the lower sections to create almost a chenille of moose.
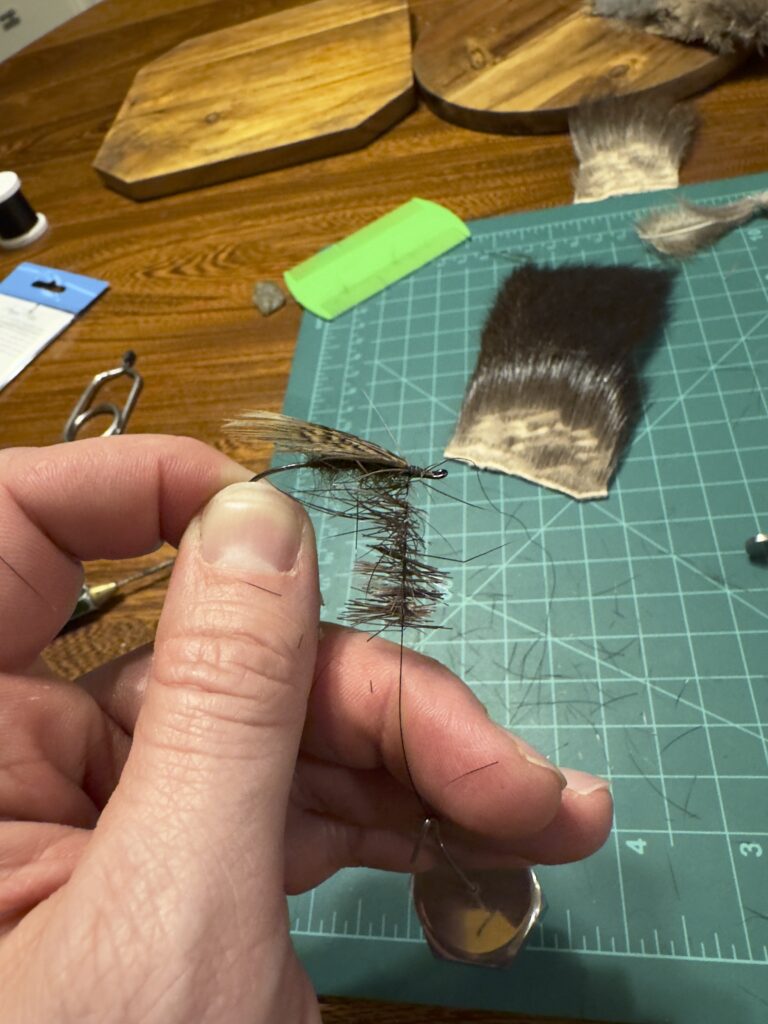
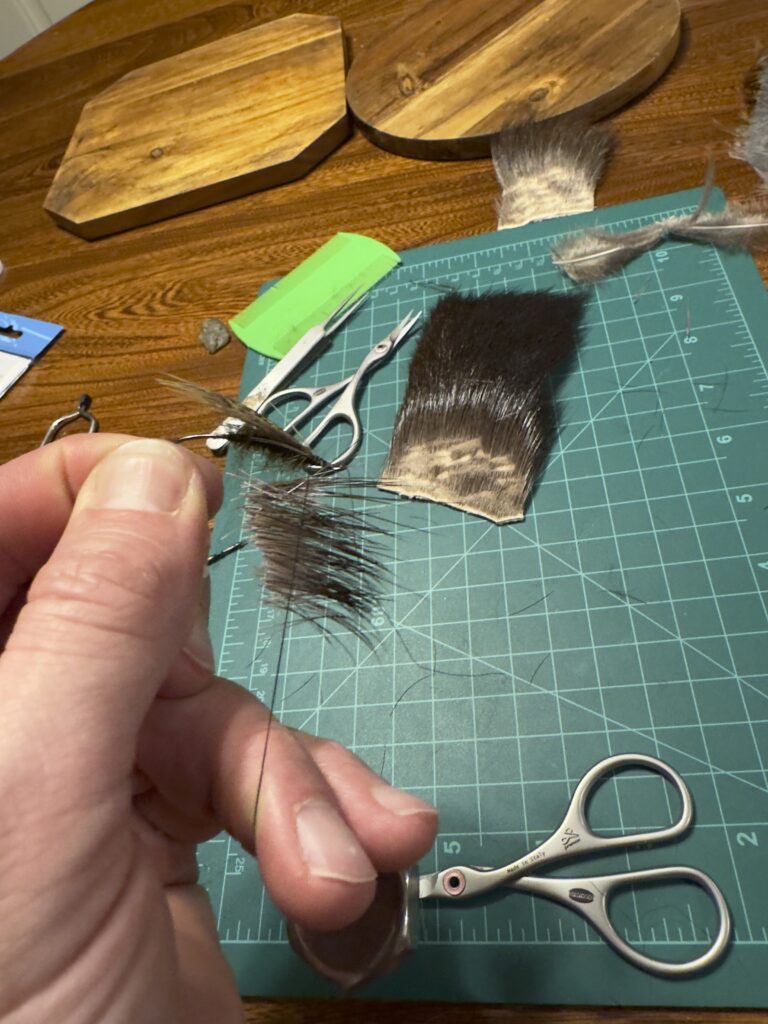
Fold the moose back like a hackle and make wraps from the base of the wing.
Fold the moose back like a hackle and make wraps from the base of the wing.
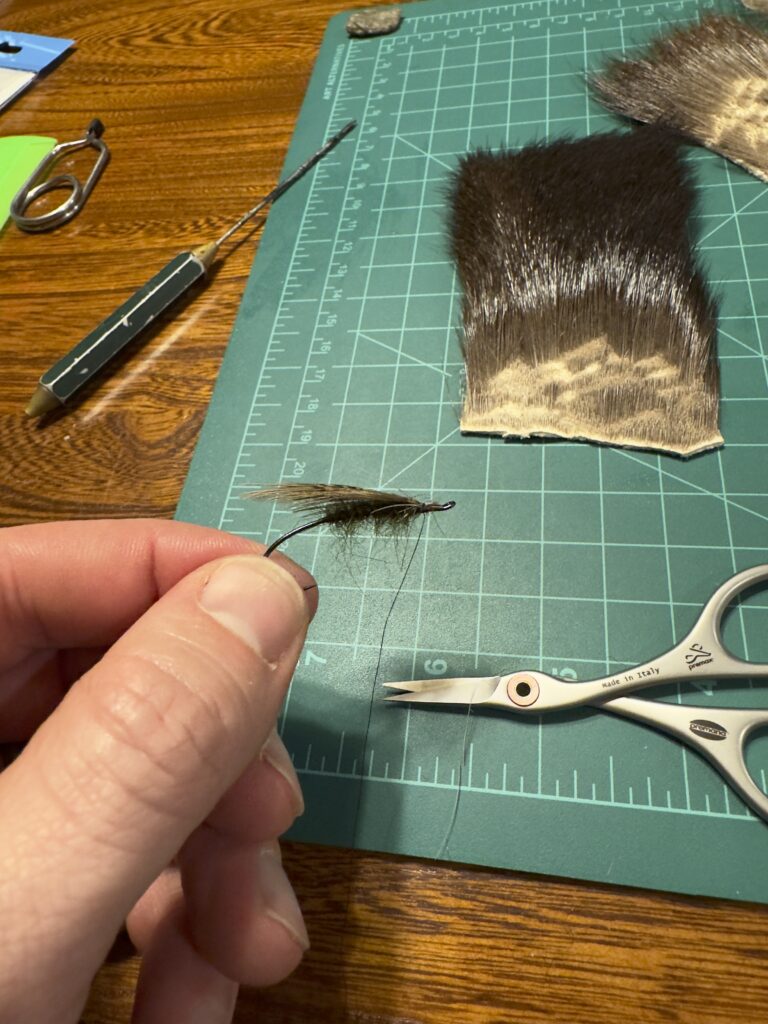
If you’ve done a good job of measuring things out, you will have wraps of moose that end near the eye of the hook, with the dubbing loop thread remaining. I finish the fly with the bare dubbing loop thread and do a series of half hitches to secure the thread before adding head cement.
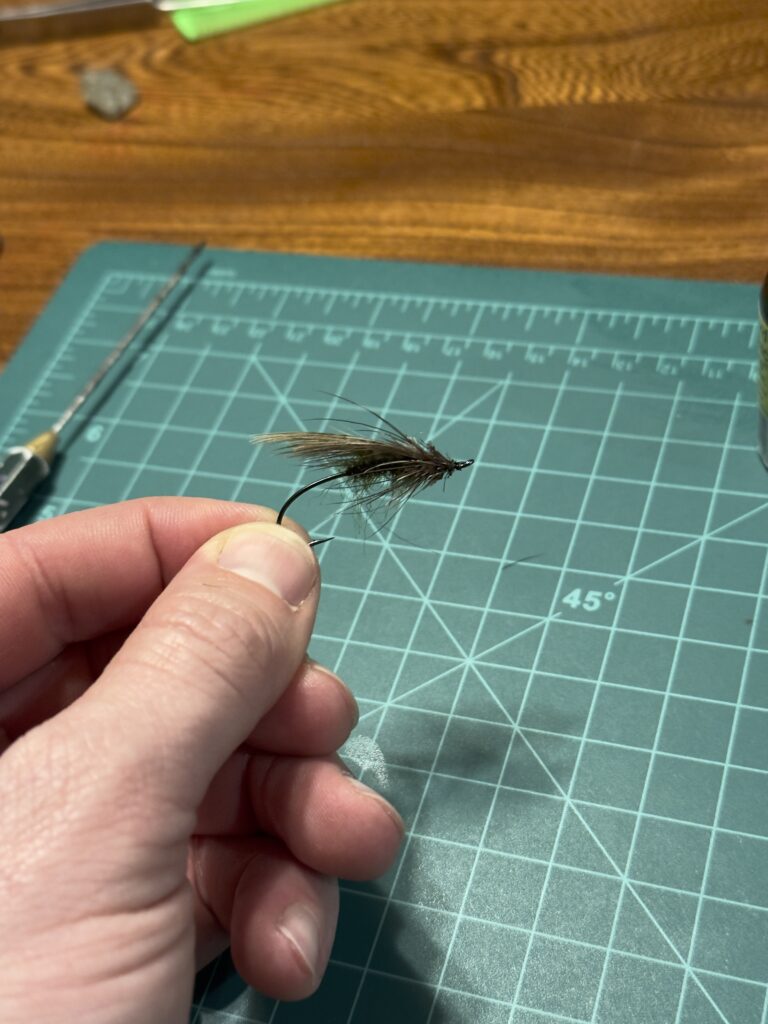
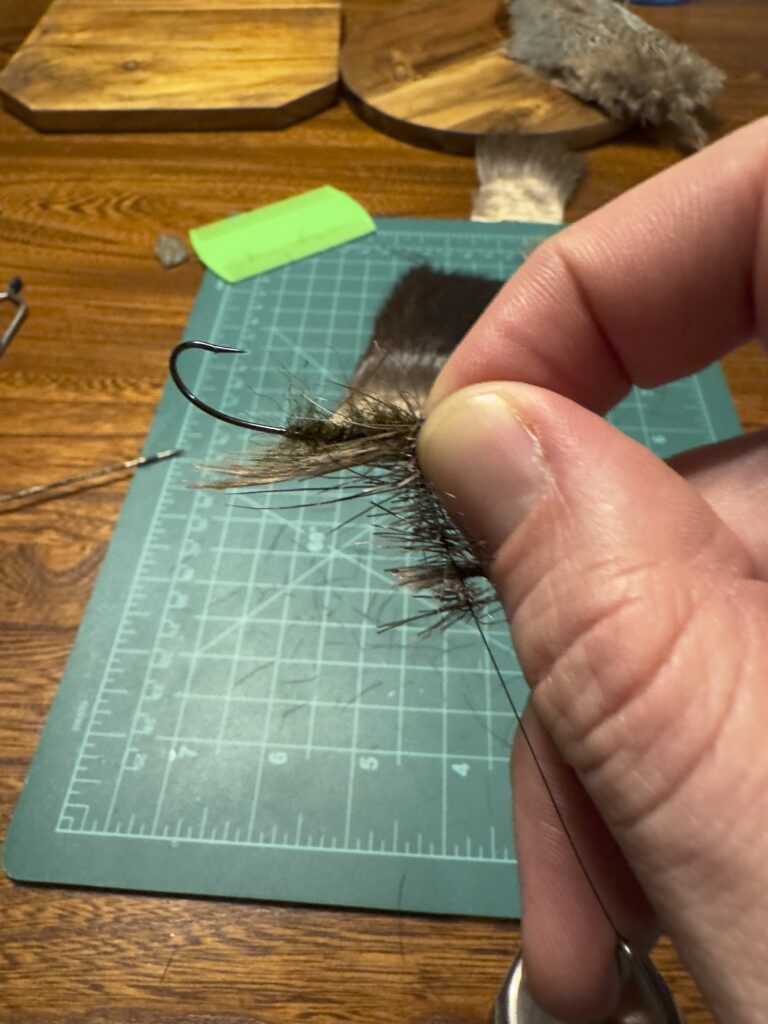
All that’s left is to trim the head. The Thompson River Caddis has a uniquely shaped head; it’s trimmed using four cuts: A flat cut to the top, one to the bottom, and then angled cuts to each side.